


While playing, you notice that your frame rate varies, but you need to figure out why. I discovered that there is software to track the frame rate while playing. You can track your FPS, but you don’t want that software to reduce your gaming performance. Well, I’ve compiled a list of the top 8+ FPS counter Windows apps to help with that. The software will track your GPU, CPU, RAM utilization, and frame rate. In addition, you may record your most intense gaming, snap photos of the lovely game environments, and even live stream the games. So without further ado, let’s get started.
8+ Best FPS Counter Apps For Windows To Try
Let’s start our list of the best FPS Counter Apps for Windows.
1. DXtory

DXtroy’s memory is provided via the DirectX Surface Buffer, enabling quick screen capture and video recording. The software takes high-quality video clips. Without sacrificing quality, it records video down to each pixel. As a result of its VFW codec supporting system, you may now choose the video codec of your choosing. Because the software enables the user to record mic inputs and game audio in different ways, record several audios concurrently and use them in different ways.
1 – Download & install Dxtory on your PC.
2 – Use the start menu to launch the Dxtory software.
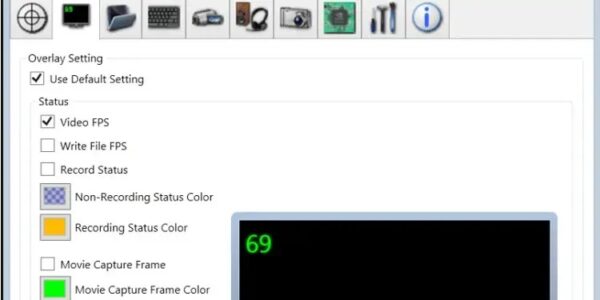
3 – Click the tab labeled Overlay Setting and Status by clicking the monitor icon.
4 – Change the settings under status to your preference.
5 – Under the status menu, adjust the overlay setting’s position, size, and alignment on the right.
6 – Start the game, and the FPS counter will show up in line with your preferences.
2. Fraps
Many gamers still use the software today, even though updates ceased after 2017. Features offered by Fraps include the ability to screenshot and record gameplay. Nevertheless, you must purchase the premium version of the fraps app to unlock those features. Both Windows 10 and Windows 11 run for seamless Fraps operation. Even though the software is outdated, its fundamental features, including recording and tracking FPS, work without a hitch.
1 – Download & install Fraps on your computer.
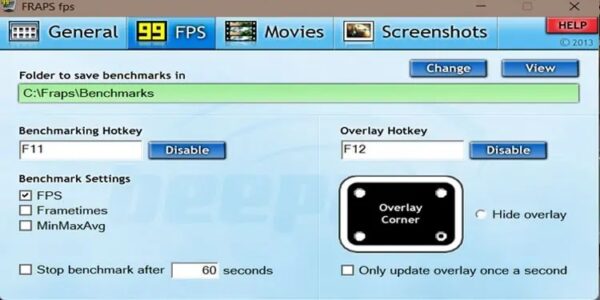
2 – Click the FPS tab in the software settings.
3 – Select the FPS box under Benchmark Settings.
4 – Select the overlay corner location where you want your FPS to appear.
5 – Start a game.
6 – Toggle the overlay corner on and off by pressing the set overlay hotkey.
3. Steam In-Game FPS Counter
While playing the game, you may view the overlay FPS counter on Steam. Unlike other software that captures and streams video games, it merely shows the FPS counter. But it does a fine job of representing its universe.
1 – Open Steam.
2 – In the top right corner, click Steam.
3 – Clicking Settings will bring up a new window.
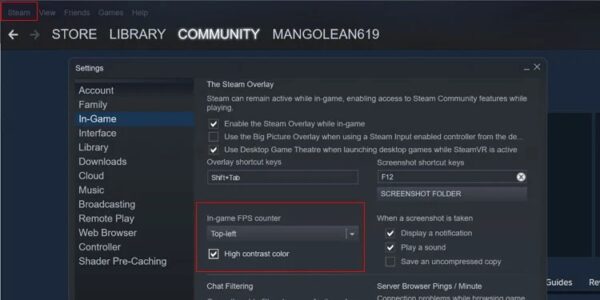
4 – From the list, choose In-Game.
5 – Check the box next to “Enable the Steam overlay while in-game.”
6 – A drop-down option is located underneath the in-game FPS counter.
7 – Decide where you want the FPS counter to be displayed.
8 – To enable it while playing, press Shift+Tab.
4. Xbox Game Bar
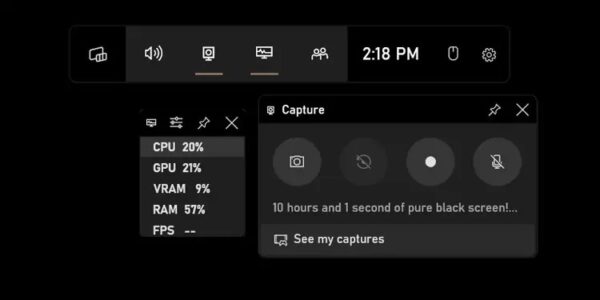
My first encounter with the FPS counter was at the Xbox Game bar. It enabled me to see my GPU, CPU, RAM consumption, and the game’s frames. Once I know which hardware wasn’t performing to its maximum capacity, I can adjust certain system settings to use all of my hardware fully. I didn’t need to download any additional software because Windows already had it. An alternative setting will appear on the window if you press and hold the Windows button while also pressing G. It controls whether an FPS widget is activated while a game is being played.
1 – Start a game.
2 – To enable the game bar, use the window+G key.
3 – Click the performance icon in the game bar’s center.
4 – Check the boxes next to the items you wish to display.
5 – On the side of the screen, a little widget will appear.
6 – There is a pin option in the widget bar. Select the pin icon.
7 – Press the ESC button to leave the game bar.
8 – FPS tracking is now possible while playing games.
5. MSI Afterburner
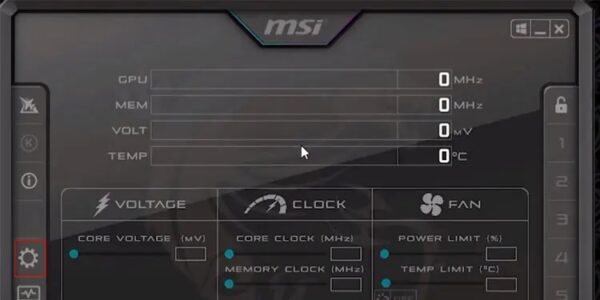
You may track graphical use activities using this software designed particularly for graphic cards. MSI Afterburner is used to view FPS when playing games and to overclock the GPU. In addition, using MSI Afterburner will boost your software performance since it maximizes the capabilities of your hardware.
1 – Download & open MSI Afterburner.
2 – Open MSI Afterburner properties by clicking the Gear settings icon.
3 – Click the Monitoring tab.
4 – Select “Framerate” from the list of Graph to enable.
5 – Select Show in On-screen Display under Framerate Graphic Properties.
6. Razer Cortex
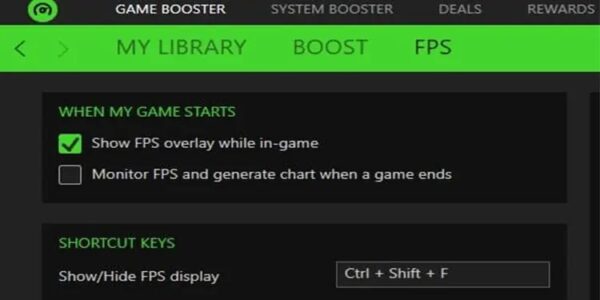
Use Razer Cortex to enable the power of gaming. The system’s Boost function will boost the performance of your computer. The booster aids in turning off other software that, by operating in the background, impedes fluid gameplay. In order to run up more space for running game memory. Play games at a better frame rate by downloading and installing Razer Cortex.
1 – Download & install Razer Cortex
2 – Start the software.
3 – Click the enable FPS counter button under settings.
4 – Launch the game and press Ctrl+Shift+F to turn on and off the FPS counter.
7. Bandicam Screen Recorder
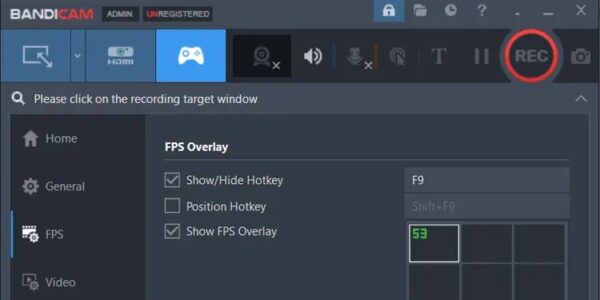
Screen recorder is how the software describes itself. It also has additional features in addition to screen recording. Many programs have software recording capability, and Bandicam Screen Recorder is no exception. It features a specific screen recorder that shows its status, but you must purchase the complete version to use it. The free version also performs admirably if you merely need an FPS overlay.
1 – Download & install Bandai Screen Recorder.
2 – Open the application and click the controller icon.
3 – The FPS tab may be found in the menu list on the right side. Just click it.
4 – The FPS menu and the position of the FPS overlay provide various options.
5 – Open a game now, and press Shift+F9 to toggle the overlay on or off.
8. GeForce Experience
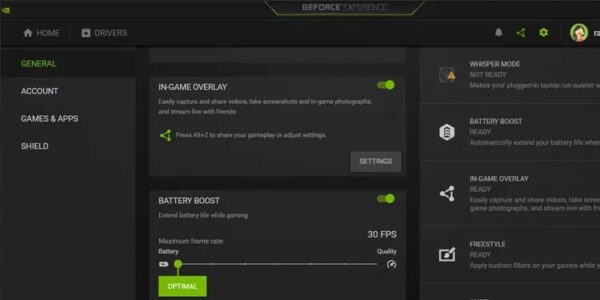
Nvidia offers software to boost performance. For example, GeForce Experience software is often preinstalled on PCs with Nvidia graphic cards. In your window, perform a search for GeForce Experience. Then, improve your game experience by adding more filters, recording games, updating your graphics card, and many other things.
1 – Download & install GeForce Experience.
2 – Open GeForce Experience and click the gear icon next to your user name.
3 – Choose General Tab.
4 – Enable IN-GAME OVERLAY from the list.
5 – Clicking Settings will bring up a new window.
6 – Click on the position where you wish to set the FPS counter in the HUD layout.
7 – There are several options available, ranging from performance to basics.
8 – A FPS HUD will be displayed after the closed software.
9 – To disable it, return to the HUD settings and switch off the HUD.
9. Radeon Overlay
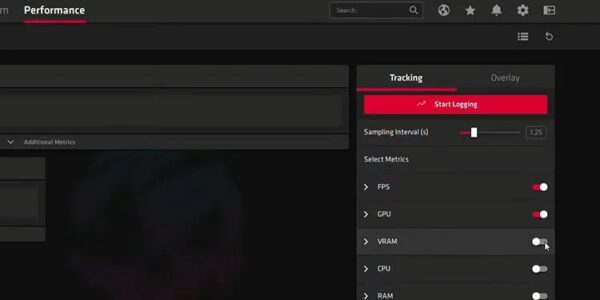
The software is for you if you have an AMD GPU rather than an Nvidia GPU since Radeon overlays do not allow graphics from manufacturers other than AMD. Because it offers features for enhancing gameplay along with FPS overlays, it is the best software for PCs and laptops with integrated AMD graphics. The features are in line with what one could anticipate from a hardware and software specialist. The instructions for using Radeon Overlay are shown below.
1 – Download & Install Radeon Overlay.
2 – Select the performance tab on the software’s lower right.
3 – The Radeon Overlay Hotkey will appear after Show Overlay is enabled.
4 – Press Alt+R to view the Overlay settings by using the shortcut.
5 – Click on the METRICS OPTION link under PERFORMANCE monitoring.
6 – Toggle the FPS Overlay by pressing Ctrl+Shift+O or enabling SHOW METRICS.
10. FPS Monitor
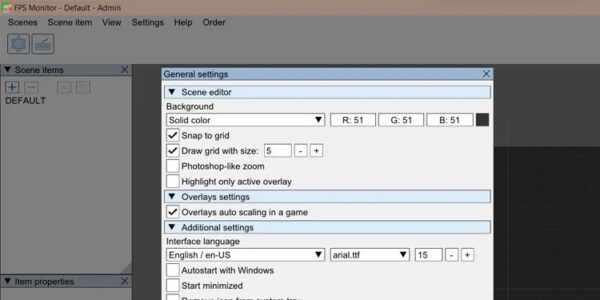
Despite the name appearing straightforward, the software’s features and customization options are extensive. You may alter the text size to fit your needs, the font color to suit your eyes, and many other options. For gamers to fully appreciate the system, the free edition of FPS Monitor is more than enough. To unlock its full power, you may purchase the complete version.
1 – Download & install FPS Monitor.
2 – Open the software by typing its name into the Windows search box.
3 – Click the Sysinfo overlay options button.
4 – Select the FPS instant option under Available sensors.
5 – You may also enable the GPU, CPU, and RAM use.
FAQs:
Why Are CPU and GPU Usages Associated With FPS?
CPU, GPU, and RAM use all affect how consistently FPS runs. In addition, the software is impacted by changes in hardware performance. Because of this, the CPU, GPU, and RAM usage are displayed to see where they are used the most.
Does Using The FPS Reduce Gaming Performance?
Your performance will only reduce if you use FPS above. However, the FPS suffers when you use additional features, like a stream and video recording.
Also, Check:
Conclusion:
It is up to you to select the best FPS counter and determine which meets your preferences the best. All the software mentioned above is easily usable on Windows 10 and 11. In addition, your windows may come with preinstalled software like Geforce Experience and Xbox Game bar. You may use these to test out any installed software before installing more. This makes it easy for you to choose from the top 8+ pieces of software.